What A Bolt Icon Indicates On A Phone Camera – A Comprehensive Guide!
The bolt icon on a phone camera represents flash settings, helping to improve photos in low-light conditions by indicating whether the flash is turned on, off, or set to automatic mode.
Phone cameras have evolved significantly, offering users an array of features and modes. Among these features, the appearance of various icons, such as the bolt icon, can often be confusing. Understanding what these icons represent is essential to making the most of your phone’s camera.
In this article, we will explore what a bolt icon indicates on a phone camera, its importance, and how it enhances your photography experience.
What is the Bolt Icon on a Phone Camera?

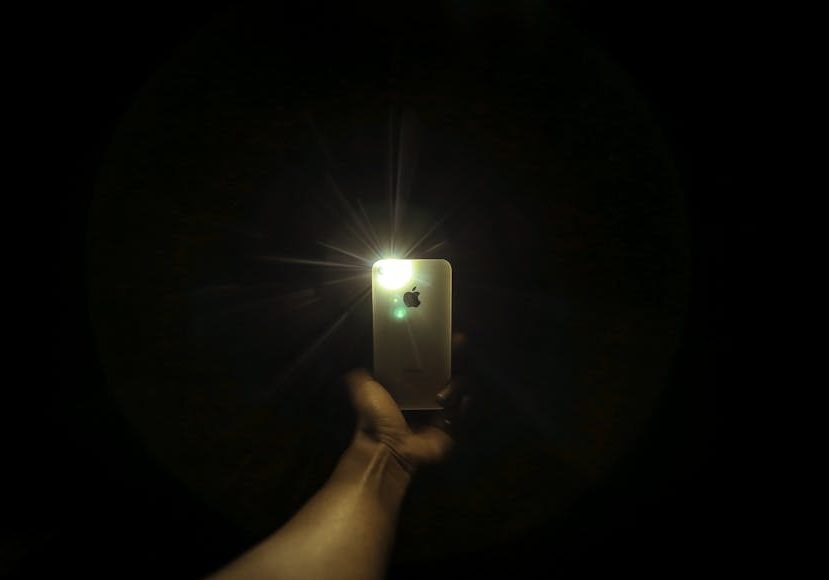
The bolt icon on a phone camera typically represents the flash feature. This icon resembles a lightning bolt and indicates whether the camera’s flash is turned on, off, or set to automatic mode. Flash is a crucial tool in low-light photography, helping to illuminate the subject for a clearer and more detailed image.
Flash Modes Indicated by the Bolt Icon:
Most smartphones offer three basic flash settings, all represented by the bolt icon:
Flash On:
When the bolt icon appears without any accompanying symbols (e.g., no “A” or slash through it), it means the flash is set to always on. This mode ensures that the flash fires every time you take a photo, regardless of the lighting conditions.
Flash Off:
If you see the bolt icon with a slash through it, the flash is disabled. This setting is ideal for situations where natural light is sufficient, or where you want to avoid harsh lighting effects on your subject.
Flash Auto:
The bolt icon with a small “A” represents automatic flash mode. In this mode, the camera’s software detects the surrounding light conditions and automatically decides whether the flash is needed. This is the most common setting for casual photography as it simplifies the process for users.
How to Use the Bolt Icon Effectively for Flash Settings?
Understanding the significance of the bolt icon is key, but knowing how and when to use each flash mode will improve your photography skills. Here’s a breakdown of when to use each mode:
Flash On:
This mode is useful in dark environments where artificial light is required. However, be cautious of overexposing your subject, especially if they’re close to the camera. A powerful flash can create harsh shadows or “white out” details.
Flash Off:
Turning off the flash is ideal in well-lit conditions or when you want to capture the ambient light of a scene. Flash-off mode is also essential for events where flash photography may be disruptive, such as concerts or museums.
Flash Auto:
This mode is a convenient middle ground, allowing the camera to decide the best settings based on lighting. It works well for most situations but may not always capture the perfect balance between natural and artificial light.
Also Read: How to Save Instagram Videos to Camera Roll – Step-by-Step!
Why Is Flash Important in Mobile Photography?
Understanding the role of flash in mobile photography can elevate the quality of your pictures. The flash acts as a light source in dimly lit environments, ensuring your subject is visible and the image is sharp. Here’s why it matters:
Enhances Low-Light Photography:
Without sufficient light, your phone camera may struggle to capture clear details. Using the flash helps to compensate for inadequate lighting, producing clearer and more vibrant images in low-light settings.
Reduces Motion Blur:
In dark environments, the camera’s shutter speed often slows down to allow more light to enter, which can lead to blurry images if your hand moves even slightly. The flash provides a burst of light, allowing the camera to use a faster shutter speed and reducing the chance of motion blur.
Brings Out Details:
Flash helps to highlight details that might be lost in shadows or dim light. This is especially useful for portrait photography, where well-lit faces are key to capturing emotions and expressions.
Common Flash Photography Mistakes and How to Avoid Them?
Using the flash feature isn’t always straightforward, and many users make mistakes that can lead to subpar photos. Here are some common mistakes and how to avoid them:
- Overexposing Subjects: Standing too close to the subject with the flash on can cause overexposure, washing out details and creating harsh shadows. To avoid this, stand a reasonable distance away, and use additional lighting sources where possible.
- Flash Reflection: Shooting reflective surfaces such as windows or mirrors with the flash on can cause glare, ruining the shot. Try shooting from a different angle or disable the flash altogether when dealing with reflective surfaces.
- Using Flash in Well-Lit Conditions: Using the flash in bright daylight can make your photos look unnatural. The flash should be reserved for low-light conditions, as it can disrupt the natural light balance of your scene.
- Relying Solely on Flash: Flash is a helpful tool but relying on it too much can make your photos look flat. For more dynamic images, consider using natural or external light sources, and adjust the exposure settings on your camera.
When to Avoid Using the Flash on Your Phone Camera?

While the flash feature is useful, there are certain situations where it’s best to avoid using it:
- Portrait Photography in Dim Light: Using a flash in close-up portraits can create unflattering shadows and unnatural skin tones. Instead, opt for soft, diffused lighting to achieve a more flattering look.
- Scenery and Landscapes: Flash doesn’t typically benefit wide scenes or landscapes. These types of photos rely on natural light, and using a flash may produce an unnatural glow.
- Capturing Ambient Light: If you’re trying to capture the mood of a dimly lit setting, such as a candlelit dinner or evening street scene, using a flash will likely overpower the ambient light. In such cases, increasing the ISO settings or using longer exposure times may yield better results.
Flash Alternatives for Better Photos:
If you’re looking to improve your low-light photography without using the flash, here are some alternatives:
- Increase ISO Settings: Many smartphones allow you to manually adjust the ISO settings, which can help capture more light in dark environments. Be cautious, though, as higher ISO levels can introduce noise into your photos.
- Use Night Mode: Some smartphones are equipped with a night mode, designed to capture more detail in low-light situations without relying on the flash. This mode uses advanced algorithms to brighten images while maintaining sharpness.
- External Lighting: Small, portable LED lights or ring lights can be a great alternative to the phone’s flash. These lights are often more flattering and allow for more control over the direction and intensity of light.
FAQ’s:
1. What does the bolt icon on a phone camera represent?
The bolt icon signifies the camera’s flash settings, indicating whether it’s on, off, or in auto mode for enhancing photos in low-light conditions.
2. What does the bolt icon with a slash mean?
A bolt icon with a slash indicates that the flash is disabled, ideal for well-lit situations or when flash could disrupt the ambiance.
3. When should I use the flash-on mode?
Use flash-on mode in dark environments to illuminate your subject, but be cautious of overexposure, especially in close-up shots.
4. Why should I avoid using the flash for portraits?
Flash can create unflattering shadows and unnatural skin tones in portrait photography. Instead, opt for softer, diffused lighting for better results.
5. What is an alternative to using flash in low light?
Alternatives include increasing ISO settings, using night mode, or external LED lights to capture better low-light photos without using the flash.
Conclusion:
The bolt icon on your phone camera is a crucial indicator of the flash settings, helping to optimize your photography in various lighting conditions. Whether it’s set to on, off, or auto, understanding when to use each mode can significantly enhance the quality of your photos. By avoiding common flash mistakes and exploring alternative lighting solutions, you can capture stunning images, even in challenging low-light environments.


